History of Dorothy Perkins Roses:
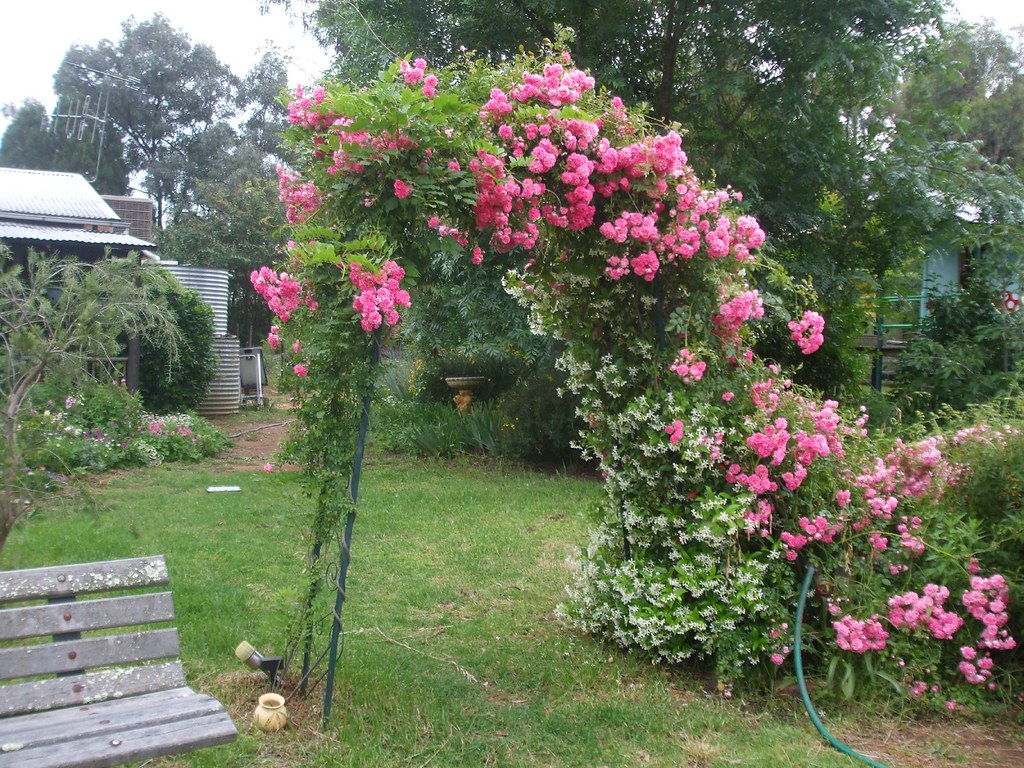
The rose Dorothy Perkins was first bred in the United States By E. Alvin Miller in 1901. Miller was a plant propagator and foreman at Jackson & Perkins around that time period and helped grow and raise a wide range of different types of roses. He created this particular variety by crossing the Madame Gabriel Luizet rose with a Rosa wichuraiana. The result was an extremely vigorous climbing rose that produced small delicate blooms that are only about an inch and a half in diameter.
The small blooms on Dorothy Perkins roses actually contain quite a few petals for their small size. You can expect to find blooms with as many as 40 petals each. These pink or salmon colored flowers will form in large clusters of blooms and will have a somewhat mild fragrance. As the blooms age, you can expect their color to get darker over time. The rose Dorothy Perkins is often grown as a container rose, and pruned to a stout height, or it is grown directly in the ground to compliment your landscaping ideas.
Growing Dorothy Perkins Roses:
The rose Dorothy Perkins will reach heights of anywhere from 10 feet tall, all the way up to 20 feet tall if left unchecked. It will also spread out fairly nicely and reach widths of about 8 feet across. This rose is pretty hardy and will do well in zones 4 through 9, however you will need to provide it with freeze protection in early spring when cold snaps can sneak up on you without warning. If you are going to grow this rose in a container, you will have to provide it with winter protection so the roots do not freeze.
Dorothy Perkins roses are typically one time bloomers in the late spring or early summer and the rest of the year you can expect to get scattered blooms. If you want to get the most out of this rose you should try to find it a home in your garden where it will receive a lot of sun light. A good rule of thumb for growing the rose Dorothy Perkins is to give it a minimum of 6 to 8 hours each day of direct sun light. You will also want to provide it with soil that drains well.
Planting Dorothy Perkins Roses:
Planting the rose Dorothy Perkins in your garden is not terribly difficult and chances are you already have the tools to do the job hanging in your shed. Before you dig any holes however, I always suggest to growers that they take a trip to their local garden center and pick up a bag of a good organic compost. Once you dig your hole, mix the compost in with the loose soil at a ratio of 1 part compost for every 2 parts soil. This stuff makes a great amendment for just about any type of soil and your plants will love it.
See Also: A Complete Guide to Caring for Your Trees
How you go about planting your Dorothy Perkins roses does depend a little on how you purchased them. If you found one locally then it was most likely already planted and established in a container. These are the easiest to get into the ground because all of the guesswork has already been done for you. You are going to want to dig a hole that is at least twice the diameter of the container it came in, and equally as deep. This gives you plenty of room around the roots of your rose Dorothy Perkins for your new soil mix while still keeping the bud union at the depth it was originally planted. This is very important.
If you ordered your rose Dorothy Perkins from an online retailer then it was probably shipped to you as a bareroot plant. These may look intimidating but they are not difficult to plant. The first thing you should do is soak the plant overnight in a bucket of lukewarm water to help rehydrate the roots. Then dig yourself a hole that is as wide as the longest roots on the plant, and deep enough so that you can set the plant atop a mound of soil and still keep the bud union about an inch or two below the surface of the soil.
Once you have your rose Dorothy Perkins set in place, spread the roots out in all directions around the mound and then back fill the hole only halfway to start, using your new soil mix. Take the garden hose and water the loose soil heavily so that it flows around the roots like mud. Then go ahead and back fill the hole the rest of the way and then give it one more heavy watering. Top off any final settling that may occur. You should also mound up some mulch around the exposed canes to help prevent them from drying out while new roots are forming. Once you see new growth on the plant you can remove the mulch mound.

Caring for Dorothy Perkins Roses:
Taking care of the rose Dorothy Perkins is not difficult and you can follow basic rose care maintenance. Roses need ample water to perform well but you must also make sure that you are not overwatering them. A good rule of thumb is to give your roses one deep watering each week unless you live in a hot or dry region.
You can give your Dorothy Perkins roses a dose of a good all-purpose granular fertilizer in early spring when the leaves start to bloom. This will help your roses get off to a quick start and have a more productive blooming period. Since this rose only produces scattered blooms later on in the season, you can decide whether or not to give it additional feeding throughout the rest of the growing season.
Pruning Dorothy Perkins Roses:
The rose Dorothy Perkins is usually pruned after the big blooming period in late spring or early summer. Start by removing any dead wood, as well as any canes that look discolored from disease. Next, prune back any lateral canes that overlap one another so that the leaves do not compete for sun light. Lastly you can give this rose a light pruning for shape and desired height.
This is also a great time to rake up around the base of your roses to clean up any debris that may have collected since the previous growing season. Throw away this material in the trash along with your cuttings and never throw them into the compost pile. I always finish up my pruning by giving my roses a fresh layer of mulch.
More to read: How Professional Services Benefit Your Landscape